Probably the most important thing that I took from this class was learning some of the settings and how to use my camera. One of the most important things right off the bat was my ISO settings were at 1600 and my autofocus was set to focus on the left middle side of the screen. I didn't know anything about either of these things but they were both reducing my image quality by quite a bit. Figuring out how to change the area where the focus will be on was extremely important and I can't believe I had never figured that out before. It is kind of disappointing knowing that I have taken some really cool trips and missed out on some great photo opportunities because my settings were wrong.
Another very important thing was learning how to shoot in aperature priority. This is what I shot in the majority of the semester and I like the lighting options that it gives you and allows you to play with. Depth of field is extremely important in many of my opportunites to take photos and I had never understood how depth of field worked previously and was not happy with it a lot before.
I had the opportunity to get very close to a black bear in the Pryor mountains right here. Despite snapping hundreds of pictures I was very disappointed in the quality of them. Looking back now I think of ways that I could have fixed that. Aside from those mentioned already exposure compensation is an important tool to use. I was shooting the black bear in sport mode on a bright sunny day, and normal camera functions usually turn everything a certain percentage gray. My pictures of the bear come out gray it was pretty disappointing. I with I would have known about exposure compensation then to make the bear blacker.
One take home point from the class was the seven rules of photography. The seven rules are; red is more attractive than yellow, jagged lines are more attractive than curved lines, light is more attractive than dark, large draws more attention than small, difference draws more attention than conformity, diaganol lines are more attractive than vertical lines, and sharpness is more attractive than blur. These general rules are easy to follow and usually if you can obey a few of them in an image it will become very interesting visually.
Another thing I learned that may be very important for me in the future is the use of RAW format to take pictures. I like all of the adjustments that can be made when it is first opened and photoshop becomes available. What makes this option seem appealing to me is that even if the settings aren't quite right on the orignal image they can be tweaked quite a bit to look very realistic.
I have always been told that I have a good eye for setting up a composition. That wasn't really what I was worried about coming into this class. I have taken a lot of picutres since college began and have gotten used to what I need to do to set up a good composition. I went into this class knowing very little about camera settings and I got everything I wanted. As mentioned earlier there are a lot of mistakes I have made while photographing on previous school trips or other trips I took myself in cool locations such as the Galapagos and Costa Rica.
Sunday, December 5, 2010
Section 6 - Digital Processing
Chapter 6 discusses what happens after the image is taken in the field. It talks about filling up a 1-2 GB storage card such as a compact flash. The author recommends using multiple small capacity cards in case of a disaster which causes the loss of all images on the card. It also recommends backing the images up on both a hard drive and a computer in case the images are lost from one of the places. More battery power allows the photographer to look through the images and delete the ones that are poorly exposed, leaving more room for photos in the field.
RAW mode is the mode used exclusively by most professional digital photographers. RAW saves all of the data in its original state with no processing of the image done by the camera. No sharpening, color changes or tweaking of contrast are done in this format. These images must be turned into a TIFF or PSD to work with them on a computer. The author recommends Photoshop CS for most digital cameras.
The original RAW image when first opened looks dull an unsharp. The chapter goes on to discuss how this can be fixed using Photoshop. They first suggest making changes using adjustment layers that can be turned on and off. The recommended first adjustment is to the brightness. Usually it is only a small change unless there was something that stood out on the histogram. The author says to use common features as a reference because they take up a large portion of the composition. The next adjustments are done with the levels scale which changes certain tonal ranges such as the whites and blacks. The next step given is to adjust the color saturation. This can be done to all of the colors at the same time or by choosing only red or green and so on.
Contrast refers to the difference between the colors in an image. A scene with high contrast has a very large difference between the brightest brights and the darkest darks. Usually adjustments are made to allow for as much color recording as possible while retaining an original that is similar in appearance to the scene as seen while the photo was shot. The histogram can give an idea of high contrast if there are gaps in it. These gaps show lack of color information in that tone. Different contrast adjustments include a standard overall adjustment and a shadows/highlights adjustment and a midtone contrast adjustment.
Other adjustments are more specific to certain parts of an image. There is a digital version that allows for dodging and burning. Other tools highlight certain regions that can be adjusted individually. The next step is to retouch things such as telephone wires, garbage, and other unwanted options from the compositon. One way to do this is using the healing brush. This tool takes pixels from one par that was selected to the part that needs some touching up. It matches automaticalls in light and texture. The other way to do this is the clone stamp, which is similar but not automatically modified in light and texture.
Part Five - The Close-up World
Part five begins with a chapter on macro photography. It explains that a true macro lens has a close-up distance yielding 1:2 life-size reproduction and extends to infinity. An expensive lens can be used to take pictures of small insects to large landscapes properly. Less expensive options include teleconverters, lens extensions and close-up supplementary lenses. None of these offer the image quality that a true macro lens does. Extension tubes reduce the amount of light transmitted by the lens and reduce the stop time.
The option of a supplementary lens may be better in low light conditions where a low f stop is necessary and beneficial. These doe not alter the f stop or the amount of light coming in. Different options include wide-angle lenses for expanded perspective and tilt-shift lenses for a maximum depth of field while using larger aperatures and fast shutter speeds to freeze motion. Due to the darkness of many macro situations, and the amount of light needed for a good composition, some suggestions on flashes is given here as well.
Stabilizing a macro image is one of the most important things one can do, because a longer shutter speed is going to mean more detail in the flowers. Tricks include holding the base of the flower with your hand but leaving it our of the composition or using a tool such as a plant clamp or "Plamp" to stabilize the flower to an object which isn't being affected by the strong winds. These can also be useful for lining up the flower exactly where it is wanted to be. The opposite of this would be to use a hand or something to make motion to blur out some of the nearby flowers that distract from the subject.
The best light recommended for shooting wildflowers is in overcast, hazy skies. In this situation a white matte reflectors should be used to help give detail to shadows and bring out the colors as well as possible. The opposite is true if shooting during the middle of the day under blue sunny skies. One option given is using a large umbrella of neutral colors to block direct sunlight from the composition. The reflector is then used to send soft light back into the scene and bring out even more details.
The most important part of this chapter are the tips on taking wildflower portraits. This begins by telling us to get close enough to the flower. The flower should take up a large enough part of the composition to keep it interesting. The sharp focus should be on the most interesting part of the flower so that the image appears in focus in the important parts. Using the out of focus background is a good way to add a little extra to the image. Nothing should take away interest from the main subject flower.
Section 4 - Light on the Land
The first chapter in "Light on the Land" discusses finding landcapes that will present good photographic opportunities. The first indicator listed as a good chance for a good composition is the presence of a strong, visually attractive color such as red. Other techniques, such as adding motion to water to make a normal composition more exciting, are discussed throughout the chapter. Another technique is using clouds to help make a sky exciting and shooting in snowy or foggy weather to add another element to the composition.
The chapter goes on to give hints on good times to shoot and good directions. It suggests facing north or south for a composition in the prime light hours so that the subject is sidelight. An interesting foreground can make or break a good photo, and should add to the entire composition instead of being the main subjec. A really good foreground also frames the photo or brings the viewer in to a certain portion of the composition. Another technique is using reflections off of water and adding animals to the scene. Excluding human influence is recommended.
The most important part about the next chapter is showing depth in landscapes. Having a good depth of field for a landscape photo is extremely important in showing the different planes that are visible to the human eye. Different planes usually include a blue sky plane, cloud plane, feature plane, horizontal plane, midground plane and a foreground plane. Using overlapping planes can be very beneficial if the planes are easily distinguished with high contrast. The author recommends setting up the camera at a 45 degree angle from the nearest size cue in the composition.
The beginning of the next chapter discusses techniques for capturing reflections. A tall tripod is suggested because it can be used as a walking stick and a depth tester too. A camera focal length between 20 - 100 mm is suggested because it gives enough room to frame a picture by zooming but isn't too heavy and is wide enough for large landscape reflections. Techniques such as wading into the water may be necessary to capture just the right reflection. The best time is again early in the morning or in the evening.
The basic recommended lenses are a polarizing filter and a one stop split neutral density filer, along with duct tape to hold them in place at the least. A polarizing filter at its maximum will make the reflection stand out the most, with the highest contrast. If the histogram shows less than 80% of the data is in the center then it may be necessary to use the split neutral density filter to darken up the sky. The split-neutral density filter is also recommended for scenes with bright mountain tops and darker valleys.
Section 1 - The Right Equipment
The first section of this chapter begins by explaining some of the basic details between a film camera and a digital SLR. It explains some of the benefits such as the ability to get an idea of exposure after the shot is taken, easy modification on computer programs, quick adjustment of ISO and ease of printing. It goes on to suggest a 6-megapixel camera for amateurs and a DSLR with 10-40 megapixels for serious photographers who want to make very large prints. It is also suggested that the camera have depth-of-field preview, high-speed image capture and is compatible with a cable shutter release.
The next chapter explains the importance of using a tripod. Some of the advantages of having a tripod include stabilizing telephoto lenses, stabilizing macro lenses and the ability to take long exposures and have a sharp image. A tripod should come up to eye level on a person and should also go as low to the ground as possible. A long center column is recommended. For heavy lenses, a gimbal-type head is recommended. The chapter goes on to give opinions on some brands of tripods and the stability and lightness a good tripod has.
The next chapter begins with the the focal length most photographers want in a telephoto lens. 500mm is recommended as the go to lens that is the easy choice. For those a little more extreme about getting the close up shots and willing to shoulder the weight, a 600mm may be a better choice. A more economical option is to enhance a 300 or 400mm lens with a converter such as a 1.4X or 2X. Nikon and Canon are the brands recommended because of the image-stabilization. A maximum aperature of f/4 and larger is recommended.
The main portion of the next chapter involves getting a vest for your photography work in the field. Advantages of having a vest includes knowing where everything is, ease of carrying and carrying capacity. The author uses the Lowerpro Street and Field model. Things that can be included in the vest include; memory card extras and storage, extra batteries, extra lens, plastic bag, walkie talkie, reflectors, duct tape and filters.
The next and probably the chapter most useless to anyone living here in Montana is the chapter about winter photography. It discusses using clothing with a lot of zippers rather than layers because of all of the gear photographers already have. It suggests wind and rain proof jackets. Waterproof pants are recommended due to the amount of laying and kneeling that occur during nature photography. It is recommended to bring many batteries along for long winter shoots, and storing them someplace warm because of the draining effects cold has on batteries.
Make up blog - pheasant pictures that I like
silhouette of rooster and dog
tailfeathers out of vest
rooster and dog in field with grasses blowing
I leave on Thursday for an eight day trip to South Dakota to hunt pheasants. This is probably the most exciting time of the year for me, and three years in a row we have been going. We have also not taken any good pictures three years in a row. This is kind of disappointing every year after we have a lot of fun and get a few birds and don't have any good pictures of them. The three links above are ideas that I got when I was looking for pheasant hunting pictures. They are all pretty classic photos, but I never would have known enough about my camera to do them properly. In years past, my flash would have came on to ruin the silhouette picture. My focal point would have been off and the tailfeathers coming out of the jacket wouldn't be in focus. And I never would have figured out to use a low shutter speed to get the grass to wave through the screen the way it does in the third picture. Now that I understand things such as aperature and shutter speed priority and exposure compensation these are pictures I think I can make.
Make up blog - my other camera
My back up camera at the time is a Olympus Stylus Tough. I really think that this is a great little camera for a person like me. This camera has been a lot of places I would never think about carrying an larger camera and wouldn't be able to if I tried. It works out great for me because it captures some of the best moments. Here are some of those moments that this camera really came through to get a picture when I wouldn't have wanted my other camera to be on me due to weight or weather and terrain.


Extra blog - my class goal
My two main goals as discussed in the beginning of the semester were to get a nice picture of my new puppy and to get a few good pictures of my dog Rudy and his time in Montana. Both of these proved to be pretty difficult as my puppy never seems to slow down at all and the best times with Rudy were in "foul" weather and conditions were difficult. These two pictures are my favorite out of all of the ones I took of my dogs. The thing that they have in common is the angle I was at to take the picture. For the picture of my pup Buddy I climbed up on a dead tree along the bank of the Yellowstone River. This gave me two advantages, Buddy was sad and wanted to be close to me so he tried to jump up, and when he did jump up I got a great angle to get his entire face, instead of the usual angle from level with the dog.

I tried hard this year when the weather wasn't too terrible to get a good picture of Rudy retrieving a duck. For the most part this worked out poorly. All of the ones I got were just head shots of him where you could barely even see his eyes because of the duck. This day I decided to try something a little different and get him retrieving a bird in the shallow water instead where I could get most of his body. The shot I liked the best was this one where he was pretty close to me because of the angle capturing most of his face.


I tried hard this year when the weather wasn't too terrible to get a good picture of Rudy retrieving a duck. For the most part this worked out poorly. All of the ones I got were just head shots of him where you could barely even see his eyes because of the duck. This day I decided to try something a little different and get him retrieving a bird in the shallow water instead where I could get most of his body. The shot I liked the best was this one where he was pretty close to me because of the angle capturing most of his face.

Monday, November 29, 2010
30 Pictures for Final Project
All of the pictures I took for this project and throughout the semester while on shoots intended for this class were done in aperture priority mode. A lot of my time spent outdoors during this season was hunting, and this made for some tough lighting conditions and a plastic bag over the camera more than once. The changing lighting conditions and the subjects of my pictures made aperture priority the right choice most of the time. I also did a lot of exposure compensation and changing the ISO to get the exposure I wanted with the right depth of field for the subject matter. All pictures were taken with a Canon EOS Digital Rebel XT and a Sigma 70-200mm lens. I did not use any reflectors, flash or polarizers in my pictures, mostly because they weren't readily available most of the time. Due to the number of water shots I do think a polarizer would have been beneficial. For any of the pictures without snow, I made photoshop corrections in brightness/contrast and levels only. This is because I do not really like changing the image taken too much. For the pictures with snow, I began shooting in RAW and did only adjustments from the RAW format and no photoshop. For most of these I just tried to make adjustments to make it look the way it did when I was taking the picture. I also did some cropping from pictures in both formats.


F stop - 3.5
ISO - 200
Focal length - 70mm
Exposure compensation - -1.0
Location - Beartooth Pass
About the picture - Early morning sunlight on the Beartooth Pass provided night light for this picture. I tried two different shots, one with the rocks in the foreground in focus and the rest out of focus and this one. I preferred this one.

F stop - 7.1
ISO - 200
Focal length - 400mm
Exposure compensation - +.3
Location - Yellowstone National Park
About the picture - I took these sheep pictures with a doubler on to reach the 400mm focal length. I took a lot of pictures and this one stood out because of the shadow of the horns on the body of the largest sheep. I also liked the behavior of this small group sticking close together and the one in the center eating and looking towards the camera.

F stop - 7.1
ISO - 100
Focal length - 70mm
Exposure compensation - +.7
Location - Yellowstone National Park
About the picture - This was taken during a very bright day in Yellowstone so an f stop of 7.1 still allowed a fast enough shutter speed to freeze any movement in the foreground in the grass and keep it all in focus. I like the different layers presented in this composition.

F stop - 7.1
ISO - 100
Focal length - 93mm
Exposure compensation - -.7
Location - Yellowstone National Park
About the picture - I enjoy the lighting on this picture a lot. It makes me think a lot when I look at it to try and figure out what exactly is going on which is the same reaction I had to seeing this dead tree in that area for the first time. It keeps attention on a scene that might be boring otherwise.

F stop - 7.1
ISO - 200
Focal length - 200mm
Exposure compensation - 0
Location - Beartooth Pass
About the picture - I took a lot of goat pictures to get this one that I like. I have a lot of just one goat looking up and them not doing anything very exciting, so that makes this one even better because of the young one peeking over the adults back. It separates itself from all of my other pictures of goats because of the baby looking over.

F stop - 4
ISO - 200
Focal length - 70mm
Exposure compensation - -.7
Location - Bighorn River
About this picture - I like this picture because of the excitement Rudy is showing to get started hunting. I threw the decoy bag into the picture to show that this is what he was waiting for. I wanted Rudy in focus but not everything in the foreground such as the grasses so I used a low f stop to get a shallow depth of field and underexposed by -.7 because it was a very bright day.

F stop - 4
ISO - 200
Focal length - 179mm
Exposure compensation - -.7
Location - Bighorn River
About this picture - I tried many times to get a picture like this with live a live duck, but I never liked the expression on Rudy's face as much as I did with this decoy, as well as the shallow depth of field focused right on his face and the color of the water.
F stop - 7.1
ISO - 200
Focal length - 70
Location - Bighorn River
Exposure compensation - +.7
About the picture - Probably my favorite picture from the entire year. The soft bright light of the snow that day really brought out the vibrant orange of the ducks feet and set up a picture with great contrast throughout. It was bright enough that I could keep a low ISO and a medium f stop to get most of the duck and all of Rudy's head in focus to get the composition I wanted.

F stop - 7.1
ISO - 200
Focal length - 70mm
Exposure compensation - +.7
Location - Bighorn River
About the picture - This was a shot meant to show the surroundings. I took it from my duck blind, so I wanted the cattails in the picture. Having a medium aperture setting and a low ISO allowed the capture of enough detail to get the bank on the other side of the river and catch the snow and fog over the water.

F stop - 7.1
ISO - 200
Focal length - 70mm
Exposure compensation - +.7
Location - Bighorn River
About the picture - I really like the background and foreground of this picture. If the foreground wasn't in pretty good focus it would take away the effect of the rough shadow and the picture would lose a lot. The background makes this a good shot that gives a feeling about the kind of day it was on the water. Rudy is standing right in the middle because all of the attention is supposed to be on him in this picture, the rest is just extra.

F stop - 7.1
ISO - 200
Focal length - 82mm
Exposure compensation - +.7
Location - Bighorn River
About the picture - Probably my favorite post hunting photo of the year. It worked much better having the birds up on a log where they are clearly visible. The reddish orange pheasant draws a lot of attention and leads into Rudy's face very well. A medium aperture allowed the birds to be in focus along with Rudy.

F stop - 16
ISO - 200
Focal length - 70
Exposure compensation - +.7
Location - Rock Creek, Red Lodge
About the picture - I wanted a slow f stop to slow the water down a little and capture the color of the water as best as possible. I had to hold the camera on top of a post on the bridge to keep it steady enough for the long exposure.

F stop - 7.1
ISO - 200
Focal length - 70mm
Exposure compensation - -.7
Location - Rock Creek, Red Lodge
About the picture - I like the way that Rudy looks against the snow and the slow backwater of the creek. I wanted his entire body in focus so I needed a medium aperture because he was moving as well and I couldn't go too slow with the shutter speed or he would come out blurry.

F stop - 7.1
ISO - 200
Focal length - 122mm
Exposure compensation - -.7
Location - Rock Creek, Red Lodge
About the picture - Again, I like the way that Rudy looks against the water, snow and ice. I like the medium depth of field because the lines are so jagged and interesting with a good contrast that makes the background of the composition interesting as well. I also like the angle I took the picture at above Rudy on a bridge.

F stop - 7.1
ISO - 200
Focal length - 148mm
Exposure compensation - -.7
Location - Red Lodge
About the picture - I like the way that the fence line works its way back into the trees and goes out of focus and disappears into them. I like the way that my eyes start on the fence line and follow it until it ends and then move over to the interesting trees.

F stop - 4
ISO - 800
Focal length - 70mm
Exposure compensation - 0
Location - Beartooth Pass
About the picture - This was taken just past the gates on the Beartooth pass early one cold morning and it was very windy. This made it necessary to use a high ISO and a low f stop because I could not keep the camera still long enough for a slow shutter speed.

F stop - 4
ISO - 400
Focal length - 100mm
Exposure compensation - 0
Location - Beartooth Pass
About the picture - I like the many different layers in this composition. The diagonal lines of the mountains that come down on different sides each time make it easy for my eyes to follow the trees through the different layers to the mountains in the back which are the real subject of the photo.

F stop - 4
ISO - 400
Focal length - 70mm
Exposure compensation - 0
Location - Beartooth Pass
About the picture - This is quite honestly one of those pictures that turned out much better than I had hoped for. I more or less was just enjoying the canine tracks up and down the pass road and wanted to document it and decided to get down at a low angle and get a picture of the tracks where everything else had melted already. With the road line and the curvy track pattern and the bend in the road there is a lot of interesting lines in the picture that compliment the tracks.

F stop - 7.1
ISO - 400
Focal length - 70mm
Exposure compensation - 0
Location - Beartooth Pass
About the picture - Mike was trying hard to get a good landscape shot up the canyon and was on a pretty steep slope here. I feel like I did a good job capturing that he was on a steep slope with a long drop down at the angle I took the picture.

F stop - 7.1
ISO - 400
Focal length - 100mm
Exposure compensation - 0
Location - Beartooth Pass
About the picture - I liked this tree because there is a lot going on with scars, sap, live and dead branches, and colorful bark. I wanted a pretty large depth of field to keep the composition confusing because that is the way that I looked at the tree. I didn't want there to be one obvious subject so I wanted a lot in focus.

F stop - 7.1
ISO - 400
Focal length - 70mm
Exposure compensation - 0
Location - Beartooth Pass
About the picture - I really liked the color of the moss against the snow and bark, as well as the jagged lines in the bark and the moss. A medium aperture allowed me to get everything in pretty good focus.

F stop - 10
ISO - 100
Focal length - 70mm
Exposure compensation - -.7
Location - Rock Creek, Red Lodge
About the picture - This was a tough picture to take because it was bright outside but this was in a shadow because of the overhanging ledge of ice. I wanted the water to have a little bit of ribbon effect so it didn't take away from the icicles hanging down.

F stop - 10
ISO - 100
Focal length - 122mm
Exposure compensation - -.7
Location - Rock Creek, Red Lodge
About the picture - I liked the way this picture captures the ice running smoothly yet very quickly over the ice. It was hard to stay still enough for the long shutter speed necessary to blur the water and took many attempts to get this.

F stop - 7.1
ISO - 100
Focal length - 77mm
Exposure compensation - -.7
Location - Rock Creek, Red Lodge
About the picture - I really liked the way that this picture displayed the contrasting colors of the scene. The tree in the foreground went very nicely with the color of the creek and the woods in the background. It stood out enough to get attention but wasnt' in focus enough to take too much attention from the main subject, the creek.

F stop - 7.1
ISO - 200
Focal length - 200mm
Exposure compensation - -.7
Location - Rock Creek, Red Lodge
About the picture - There were a lot of really cool ice formations on the creek this day, but it was tough to make an interesting picture out of some of the cool ones that were by themselves. For this picture I tried to add the element of the diagonal lines going through the image with the main point of interest being the oddly shaped icicle.

F stop - 7.1
ISO - 100
Focal length - 70mm
Exposure compensation - 0
Location - Rock Creek, Red Lodge
About the picture - I enjoy this composition because of how the rocks on the bottom of the creek are complimented by the different colors of the wood on this bridge. The large piece of broken ice also provides a point of interest.

F stop - 16
ISO - 100
Focal length - 70mm
Exposure compensation - 0
Location - Rock Creek, Red Lodge
About the picture - I almost dropped my camera in the water trying to get this one. I had to set it down on the bank on a log and partially steady it with some snow packed along the side and underneath to even it out. It worked out nicely and is one of the best pictures I have taken when trying to blur out the water.

F stop - 4
ISO - 100
Focal length - 70mm
Exposure compensation - 0
Location - Bighorn River
About the picture - The worst part about this picture was the pile of ducks and the goose. This is one of the best pictures of Rudy I have ever taken, with the snow and the trees and the river apparent but out of focus in the background and Rudy being very attentive but relaxed. Unfortunately the birds got covered in snow pretty quickly and the way they were set up doesn't display them very well.

F stop - 7.1
ISO - 200
Focal length - 93mm
Exposure compensation - -1.0
Location - Bighorn River
About the picture - This picture was taken on an extremely bright day and I had to underexpose by a whole stop to keep the picture from not being blown out and allow me to darken it up a little more in photoshop as well. I like the way that the ducks were set up and how they are in focus as well as Rudy.
F stop - 4
ISO - 800
Focal length - 70mm
Exposure compensation - -.7
Location - Yellowstone River, Billings
About the picture - Probably the only really good picture I have of my puppy after over a month of having him. He loses interest very quickly so I had to set up this shot pretty carefully. I had to underexpose to make sure he was not grey. A low f stop focused very well on his face and faded out down along his body which was perfect for the situation. To get him to look up at me I climbed on this downed tree and took the picture looking down at him.
Thursday, November 11, 2010
Section 3 - Adventures with Wildlife
The closer you can get to wildlife, the better the chance you will have of getting more detail into a composition, and you will have more options on how to frame the photo the way you want it. One method of getting close to animals that are wary is a blind. A blind can be anything from a camoflague blind used for hunting to a vehicle. It is meant to hide human presence. Other options of getting close include slowly stalking on your knees in a way that avoids spooking the subject and shooting in locations where animals are used to human presence such as national parks or city ponds. Another method can be to bait the subject into coming closer and being more comfortable, where it is legal.
Knowing about the subject you are going to shoot is also very important. Without knowing the habitat you will never find the subject. Knowing behavior is important also in many ways. You need to know where your subject will be during the best shooting lights and when your animal will show up in certain areas to provide the best scenes. The more homework and scouting you do, the better your composition can be because you can set up in the right spot to get the background and lighting that you need if you know exactly when an amimal will show up where.
Shooting animals in motion can create a very realistic yet abstract way to make what would be an ordinary image a little bit more exciting. Making images with motion blur is really difficult to achieve on just one shot, so this isn't an easy thing to try and do with very rare and wary animals. The best places to try and experiment with motion blurs are areas where the animals will not be spooked for very long. Another option is during mating seasons or the rut where animals are more focused on each other than they are humans. Action shots are most readily available during the early daylight and late evening hours for most species.
The foreground, midground and background planes can all be used to add to the main subject. With most compositions the subject itself will take up the midground plane. Some things that could be placed in the foreground include grasses, tree leaves or limbs, or flowers. The important part of this is that it is part of the species natural environment. For example a picture of a mountain goat would be helped by a jagged rock in the foreground that is out of focus but you can still tell what it is. The background could be composed of mountains or trees or other out of focus subjects that can add color or habitat implications to the photo.
The two most important ideas to take from this section are to do your homework and take a lot of pictures once in the field. Going out and just hoping to see an animal will more than likely turn into a waste of time. Seeing the animal is only part of it. Getting close enough to capture detail and being in the right position to have the foreground and background wanted are very important in getting an excellent composition rather than an average one. Taking a lot of pictures is also very important when trying to get action shots. Just as with people, eyes close and animals look away.
Tuesday, November 9, 2010
Section 2 - Essential skills
The most useful tool in determining if the exposure you are taking is correct is the histogram. This tool can be made to show alongside of the picture as soon as taken or when reviewing the pictures on the camera screen. A histogram has five basic areas. Tall bars to the very far right indicate something that is bright white. Tall bars to the very far left indicate something that is black. The middle area is called the midtone area. The areas close to the far right or far left are the highlight area and shadow area, respectively. Another key tool for exposure is exposure compensation. This tool helps fight the camera which would normally turn something that was very bright or very dark gray because it reads the light as if it were an average scene. Exposure compensation allows the user to increase or decrease exposure by a specified amount of stops.
One of the most challenging aspects of nature photography is dealing with varying light conditions. A general rule is to avoid the direct light of the midday sun due to a loss of detail that is caused by the excessive contrast caused by shadows and highlights. Clouds help during the middle of the day but the best time is in the early morning and afternoon when the sun is close to the horizon. Front lighting is generally preferred for shooting animals in the early morning and late afternoon because it helps give the animals detail. The opposite would be backlighting. Backlighting can create interesting abstract photos such as a halo of light around the subject or a silhouette. Side lighting gives a feeling of movement into the picture and is most useful for landscapes on a large scale where shadows add to instead of take away from the picture.
A key tool to nature photographers in fighting ever changing light conditions are filters. The most popular filter is a polarizing filter. This filter can be used most of the time while taking pictures to help increase color saturation by reducing glare off of water and other surfaces that reflect a lot of light. They usually reduce brightness by one to two stops. Another type of filter are split neutral density filters. These come in different stops and are most useful for taking pictures of a colorful landscape with a bright sky. They are then used to darken the sky by the number of stops. If the landscape does not fit with the straight line of a neutral density filter, a graduated neutral density filter can be used.
Even with proper exposures and the right lighting and camera settings, there is still much more work to be done. Image compensation seperates the best photographers from the average ones. It isn't hard with a lot of practice to know how to make a good exposure, but the composition of an image is just as if not more important. There are seven rules of visual priorities listed in the book that can help compose an image: red is more attractive than yellow; large draws more attention than small; difference drows more attention than conformity; jagged lines are more striking than curved ones; diagonal lines are more attractive than vertical ones; sharpness is more attractive than blur; light is more attractive than dark.
A good exposure will not be very interesting if the center of interest is in the wrong place. The center of interest is the reason for taking the picture, and the purpose of the rest of the composition is to support the center of interest. Generally the center of the frame is not a good place for the center of interest because eyes travel to it first in the center and then there is nothing else worth looking at in the picture and it doesn't have any kind of movement for eyes to follow and really examine an image. A dynamic picture will lead to the center of interest through other interesting parts of the composition. The rule of thirds is good to follow, placing the center of interest one-third of the way from the top or bottom and sides.
Thursday, October 28, 2010
A Picture I would like to take

This may be one of the most common pictures I have seen taken with Labrador puppies who will one day become bird dogs. My new puppy is still a lot younger than this but it is something I would like to do eventually. I already have the lanyard with the old calls and a few bands, the old Winchester, the black lab pup and the 80's camouflage. It is one picture I would like to get as a keepsake.
I like how this picture works because you work your way through it very easily starting with the pups eyes and to the gun and then the lanyard. I also like how the background is blurred to the point that it doesn't draw any attention away from the main subject but it does add a little because you can barely tell that there is a field back there with some grasses. It appears to be an early morning light shining directly towards them.
After this picture I will have to get a picture of the pup playing in the decoys with a few dead greenheads in with the decoys as well.
This image can be found at www.greenagency.net
Thursday, October 21, 2010
Outdoor Photographer Articles
Atacama Adventure
This article discusses the Atacama Desert of northern Chile, the driest place on Earth, and the photographic opportunities that can be found there. These opportunities include desert vegetation such as cacti, shrubs and flowers that make great subjects on otherwise barren landscapes. Prehistoric sites and rock paintings are also a draw to the region. Solitude should be expected, and the vast landscapes and clear air allow for backgrounds that seem to go forever.
As with most deserts, and even more so in this high elevation desert, you can't show up with just a t-shirt and a pair of shorts. Most nights get below zero and there is no shelter from the wind which can be fierce. The article suggests camping for those serious about getting good light conditions, and says that the time frame is about 15 minutes because the sun rises and sets nearly vertically due to the deserts location very close to the
Equator.
Most Wanted
This article highlights wildlife photographer Kevin Schafer's obsession with shooting animals that are out of the ordinary. He strays from the bears, elk and birds of North America to travel where he can shoot animals that are less frequently seen and known of. Kevin got bored with shooting the pictures that everyone else already has, and now has started his own project called "Empty Ark".
For this project, he goes around trying to capture images of animals that no one knows of that are in great need of conservation. It is not hard to get people to care about a panda or a polar bear because the publicity is there. Kevin uses the images he captures of these rare and threatened species to help conservation groups protect these species. With photos that capture more than just a blank image with the subject species right in the middle, Kevin tries to touch on human emotions to get people to care to protect the species.
Thursday, September 30, 2010
Barry and Cathy Beck
This week I decided to look at more flyfishing photography pictures. What I found was photography by Barry and Cathy Beck at http://barrybeck.photoshelter.com/. When I was doing this I was really looking for some action shots but what I found was another interesting way to hold a fish for a photo.

He uses the fish as diagonal line in the picture, adding more to the overall photo than just a fish. I have become interested in finding ways to make those pictures of average trout a little more interesting and I really like this idea.
He uses the fish as diagonal line in the picture, adding more to the overall photo than just a fish. I have become interested in finding ways to make those pictures of average trout a little more interesting and I really like this idea.
Thursday, September 23, 2010
Pictures that are bad
While looking through all of the hunting pictures I have been lately I have realized that there are some picture types that I absolutely hate. For example this is my least favorite of all hunting pictures. It's terrible, but I have seen even worse ones where the guys hunting are pointing their guns at the bird right in front of the photographer. Hopefully their guns are not loaded and guranteed they are dumb pen raised birds that don't ever fly until that very moment after some old farmer planted them in that spot maybe even in a little wire cage so they can't run anywhere and have to fly right up between photographer and "hunter". These photos don't capture the feeling of the hunt at all, because there really is no hunt even going on. This one is just as bad, the hunters are like 20 feet apart, and to add to it, they are clearly not in a milo field, I believe that is corn. Another thing I hate, when photographers can't label their pictures right because they don't know what they are talking about.
Thursday, September 16, 2010
7 Rules of Photography

Red is better than yellow, enough said.
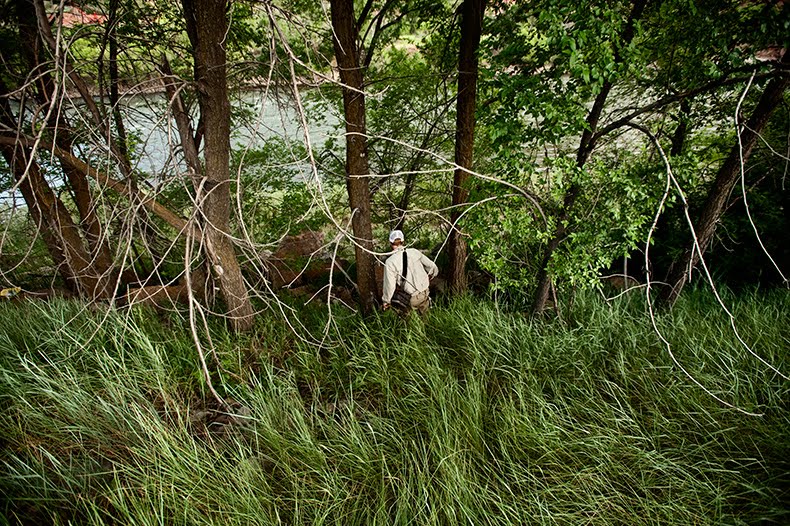


Difference draws more attention than conformity. Without the graffiti, this would just be a picture of a man fishing. Normally one would not think to be fishing in an area with lots of graffiti. Photo by Copi Vojta.

Sharpness is more attractive than blur. The point of this picture was probably to try and sell it to sage, not a birdwatcher, and therefor the reel is in focus and the bird just adds a little to the picture. Photo by Copi Vojta.


See post Copi Brookbear Vojta for more information on his pictures.
Copi Brookbear Vojta
Copi Vojta is another photographer that recently had a few pictures featured on midcurrent flyfishing news. When I first got to his page I looked at his about me section on his website and got a good laugh out of it. It seemed like an interesting attitude he portrayed and I was immediately excited to get a look at some more of his pictures.
Like his small autobiography, there is a unique sarcasm to many of his pictures that only a fly fisherman would understand. A lot of his pictures are abstract, and he uses a lot of black and white. Even when not in black and white the colors in his photos are not very vivid, and there is a lot of grey. It is a nice change from normal fishing photography, where the bright colors of the fish and the sky and equiptment are emphasized, and it works very well for him. He appears to be one of those photographers that takes the rules that my next blog will be about and then breaks as many of them as possible in every picture because he can. Normally I can't stand abstract photography, and I want vivid colors and sharp photos, but these pictures have been my favorite so far this year.
Like his small autobiography, there is a unique sarcasm to many of his pictures that only a fly fisherman would understand. A lot of his pictures are abstract, and he uses a lot of black and white. Even when not in black and white the colors in his photos are not very vivid, and there is a lot of grey. It is a nice change from normal fishing photography, where the bright colors of the fish and the sky and equiptment are emphasized, and it works very well for him. He appears to be one of those photographers that takes the rules that my next blog will be about and then breaks as many of them as possible in every picture because he can. Normally I can't stand abstract photography, and I want vivid colors and sharp photos, but these pictures have been my favorite so far this year.
Tuesday, September 14, 2010
Exposure
I strongly believe that the most prominent problem with having no formal training in photography for me is not knowing anything about exposure. I rarely switch from the auto-focus sport mode on my camera for this reason, even though I know it handicaps my ability as well as the camera. The only thing I really ever did to change the lighting of the picture was to turn the flash on or off or change where the sun was in relation to the subject if possible. My interest in photography is more to capture special moments and take pictures for my family and friends to enjoy, so I never really worry about any manual settings on the camera to change exposure. After reading the chapter on exposure, I am starting to think that manual settings could help more than I thought they would originally. It seems that the things I enjoy most climax at sunrise or sunset, or shortly thereafter, which can lead to some difficult situations to shoot in a pre-programmed mode. The best hunting and fishing times are usually near dark, when it is very important to pay attention to exposure, and also the times that I want to capture the moment.
Before reading this chapter, the histogram was only that annoying thing that popped up on the viewfinder if I accidently pushed some button that I then had to figure out how to undo. I now see how the histogram can be very useful. On a histogram, tall bars on the far left side can mean that the photo is underexposed, and something in the picture is black. Tall bars on the far right sixe can mean that the photo is underexposed, and something is very white. This can also be advantageous if the effect you are looking for is a black bird silouhetted against the sunrise or if you are trying to capture the whiteness of snow or something else that should be pure white for example.
Light metering is something that I had never even heard of or considered as something that could really affect the way my pictures turn out. Once again, I rarely find myself shooting in an average light scene because of the things I enjoy taking pictures of, so this could have a large impact on my picture quality. The reading suggests evaluative or matrix metering as the go to mode for most situations. This takes light from 15 to 30 different points on the scene and makes the exposure using real life algorithms. Spot metering may be useful for me as well because it makes sure that the main object of importance is correctly exposed. I think this could be a good option when trying to take picture of my dog at close to mid range. Another option is center-weighted metering but this option focuses on only about 75% of the frame, and even I know that the middle of the picture isn't usually where you want to focus your main subject.
There are a few different modes on my camera that let me have more control over exposure than the pre-programmed modes. Aperature priority mode allows me to choose the aperature while the camera decides on the shutter speed. The book suggests using a large aperature size for shooting moving objects such as wildlife, or my dog that won't sit still for a picture. Shutter priority mode is the exact opposite of aperature priority, and full manual mode allows me to control both aperature and shutter speed.
The suggested way to deal with the difficult and strong lighting at sunrise and sunset is to take a spot meter reading of the sky not including the sun. This ensures that the exposure of the sky is correct, and the rest of the picture will usually go with it. After getting the reading from the spot metering, the photographer should use the same exposure settings and take the picture the way that they want it to be. Then all is left is to hit that once annoying button that now leads to the useful histogram that will give an idea of what the lightest and darkest parts of the picture will look like.
Before reading this chapter, the histogram was only that annoying thing that popped up on the viewfinder if I accidently pushed some button that I then had to figure out how to undo. I now see how the histogram can be very useful. On a histogram, tall bars on the far left side can mean that the photo is underexposed, and something in the picture is black. Tall bars on the far right sixe can mean that the photo is underexposed, and something is very white. This can also be advantageous if the effect you are looking for is a black bird silouhetted against the sunrise or if you are trying to capture the whiteness of snow or something else that should be pure white for example.
Light metering is something that I had never even heard of or considered as something that could really affect the way my pictures turn out. Once again, I rarely find myself shooting in an average light scene because of the things I enjoy taking pictures of, so this could have a large impact on my picture quality. The reading suggests evaluative or matrix metering as the go to mode for most situations. This takes light from 15 to 30 different points on the scene and makes the exposure using real life algorithms. Spot metering may be useful for me as well because it makes sure that the main object of importance is correctly exposed. I think this could be a good option when trying to take picture of my dog at close to mid range. Another option is center-weighted metering but this option focuses on only about 75% of the frame, and even I know that the middle of the picture isn't usually where you want to focus your main subject.
There are a few different modes on my camera that let me have more control over exposure than the pre-programmed modes. Aperature priority mode allows me to choose the aperature while the camera decides on the shutter speed. The book suggests using a large aperature size for shooting moving objects such as wildlife, or my dog that won't sit still for a picture. Shutter priority mode is the exact opposite of aperature priority, and full manual mode allows me to control both aperature and shutter speed.
Thursday, September 9, 2010
Tosh Brown Photography
Daily if I have a working computer at home, and every other day if not, I go on my favorite flyfishing news site Midcurrent and look at everything new and exciting in the flyfishing world. Usually about once a week there is an interview with a photographer that almost always is involved with nature photography and of course fly fishing. This week was an interview with Tosh Brown. Tosh got into photography by trying to promote a travel agency. When he started selling pictures to editors, he sold his company and became a full time photographer. When I went onto his website I started looking around at a section properly named "not too serious" and found a picture that I saw in the drake magazine pamphlet that was given out at the flyfishing film festival. I felt that whether the picture was set up or actual action, it captured one of the most prominent occurances in flyfishing, losing fish.
Going through more of the pictures in the category not so serious gave me a lot of ideas about my own photography. I enjoy how the pictures are excellent quality, but about things that happen that weren't really supposed to. So much of photography is about that perfect moment in great light, and this is a completely different direction than all of that. It shows all of the imperfections that happen when out in the field.
I also almost didn't finish this blog before class because I spent time reading a blog that Tosh Brown and a few others create, called A Mouthful of Feathers.
Thursday, September 2, 2010
Hunting Photography
Although I strongly considered looking at more pictures of people flyfishing, I got the urge to take a look at some hunting pictures. A simple google search brought me to Mitch Kezar at http://www.kezarphoto.com/hunting.aspx?id=3. I am hoping to get a few good pictures during this hunting season of the dog that I am borrowing from my dad for the season and was looking for a few ideas.
I really enjoyed looking through the hunting pictures from Mitch. As mentioned, I really want a nice picture of my dog, so my favorite was the third one as I clicked through from the main screen. The picture is of a man casting his yellow lab after what is assumed to be a downed duck. What I really liked about the picture was how well it portrayed duck hunting. The excitement of the dog, the man standing in the water to hunt, the cloudy skies and the dark water are all familiar to me, and they capture the essence of the hunt. The angle chosen for the picture is excellent as well.
I really enjoyed looking through the hunting pictures from Mitch. As mentioned, I really want a nice picture of my dog, so my favorite was the third one as I clicked through from the main screen. The picture is of a man casting his yellow lab after what is assumed to be a downed duck. What I really liked about the picture was how well it portrayed duck hunting. The excitement of the dog, the man standing in the water to hunt, the cloudy skies and the dark water are all familiar to me, and they capture the essence of the hunt. The angle chosen for the picture is excellent as well.
Winter Photography
After reading the chapter on winter photography, I really only took one important thing from the entire chapter. The author suggests before leaving a cold environment to wrap up gear in a plastic bag so that the change in temperature doesn't cause too much condensation which could be harmful to the camera. There were 5 pages on how to properly dress in the wintertime that really weren't of much use to me. I was expecting a little more on what camera settings to use to shoot in certain light settings in the winter and possible filters to be using. I was pretty disappointed in the chapter because I like shooting in the winter and wanted to know more about it than how to dress.
Tuesday, August 31, 2010
First reading from class text
The text for this class is the National Audubon Society Guide to Nature Photography; Digital Edition written by Tim Fitzharris. The first assignment was to read the introduction, basic kit, and tripods chapters. It seems like this book will be very helpful, although some of the terminology and specific details on equipment are a little difficult to understand for a beginner so far. Just from the basic kit chapter and the tripod I have found that it is suggesting that the more money you spend, the better your photos will be. I am hoping that the book won't be so equipment oriented in further chapters. The trouble I am having right now is why should I spend money on new equipment if it will take away my opportunities to get outside and play around and take a few pictures?
Subscribe to:
Posts (Atom)